|
The Omni Project
If It Jams Home
|
|
My rebuilt Bosch starter for the Omni from Rock Auto failed 90 days after
I bought it, but as a close-out, it only had a 30 day warranty so I was out
of luck. With the solenoid removed, the starter would spin if powered directly,
whereas all the solenoid would do when I hit it with power was spark. My
Dodge Omni shop manual gave a test for the three terminal solenoid, checking
for continuity between the solenoid terminal (the thin wire that runs to
the starter relay on the strut tower near the battery) and ground (the case),
and then checking continuity between the solenoid terminal and the starter
terminal (as opposed to the battery terminal). The solenoid passed the test,
with low resistance for each, but I was convinced it had to be bad so I took
it apart. I had tried ordering a replacement Bosch solenoid, but the one
they sent had two holes rather than three, the type for the original Chrysler
Nippondenso starter (which lasted 26 years and 280,000 miles), so I gave
up and bought a rebuilt starter from Napa to get the car running again. Then
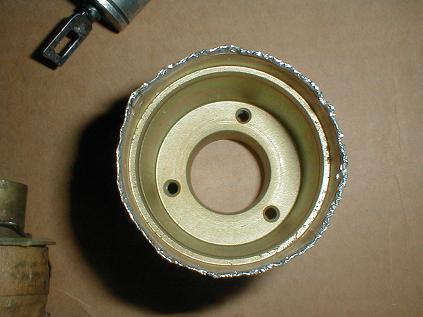
I took the solenoid apart to figure out how it was supposed to work.The picture
to the right shows the solenoid can after I peeled it open. I just used a
thin blade screwdriver to worry the crimped edge until it was free, and aside
from stabbing myself in the hand a few times, it wasn't that bad. It would
have been better if I had the sense to wear a glove on my holding hand from
the start.
|
|
|
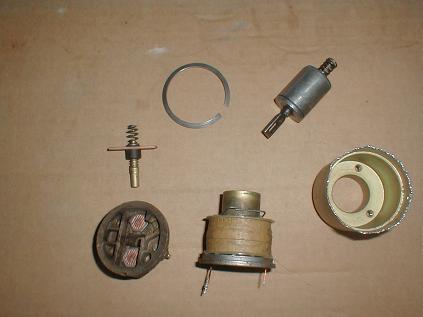
The picture to the left is an exploded view of the solenoid parts. Clockwise
from the snap ring at 11:00, we have the iron plunger and spring at 1:30,
which gets sucked in by the magnetic field when the solenoid is powered and
serves the dual function of throwing out the starter gear to engage the flywheel
and closing the switch that connects the starter windings to the battery.
At 3:00 is the can with the three threaded holes for attaching to the starter,
and a 6:30 is the solenoid coil with the two windings, that will be clear
later. Note the iron plate with the copper wires coming through. On initial
disassembly, we pried it out of the can, leaving the coil behind and breaking
the copper wire welded to the iron plate, which also serves as a magnetic
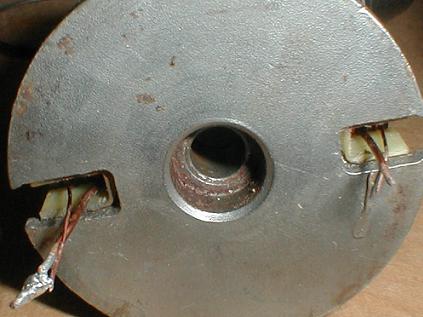
pole. At 7:30 is the bottom view of the lid with the three terminals, showing
the large copper contact pads, and just above it at 9:00 is the switch with
a copper contact plate and spring. Below we show a close-up of the copper
plate contact for the switch and the two copper pads on the heavy solenoid
terminals. The spring on the back of the contact plate sits in the hole between
the two contact pads, and the brass switch plunger goes right into the middle
of the coils and sticks out into the the interior cylinder where the iron
plunger is pulled in.
|
|
When the iron plunger is pulled in by the magnetic force of the current in
the windings, it depresses the brass plunger and the copper plate down onto
the contact pads, which completes the circuit for the heavy battery power
lead to flow current through the starter windings. Starter solenoid are actually
designed with two copper coils. The pull-in winding is the inner low resistance
coil of heavy magnetic wire to draw the maximum current for a strong magnetic
force to pull the iron plunger in against the spring force even as the other
end of the plunger is throwing out the starter gear (Bendix) to engage in
the flywheel. The outer hold-in winding is a thinner wire, higher resistance,
that need only keep the magnetic field energized to hold the plunger in place
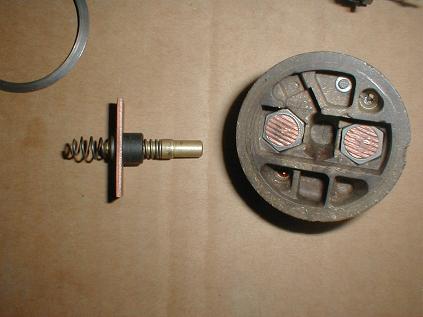
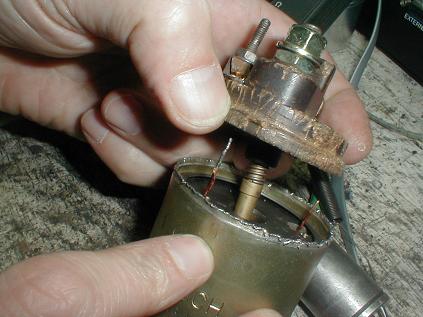
during starting. The picture below shows the nylon bobbin with the brass
core back in the can. You should be able to see that there are two different
gauges of copper magnet wire used, with the heavy wire to the inside and
the thinner wire to the outside. The picture to the lower right shows the
broken wire (in the right-hand slot) where the end of the hold-in coil is
welded to the iron plate, which contacts the case for ground. The thicker
pull-in coil wire is connected (through the lid) to the starter terminal.
We soldered the broken wire to the piece still attached to the iron plate.
|
|
|
|
|
The two windings are connected to the solenoid terminal on the other side,
soldered together. So when you turn the ignition key (or short the solenoid
terminal of the starter relay to the battery), the current flows through
both windings. Since the two windings are in parallel, the low resistance
pull-in winding will draw most of the power, since it is grounded through
the starter windings, which are also low resistance. This pulls in the plunger.
When the plunger closes the contact between the battery terminal and the
starter terminal, there is no longer a potential difference between the solenoid
terminal and the starter terminal (both are at battery potential) so current
stops flowing through the low resistance pull-in winding. Current continues
to flow through the higher resistance hold-in winding, but at a lower level,
leaving the maximum amount of current available to flow through the starter
windings and crank the starter. It's an elegant design because it also won't
attempt to crank the starter at high speed unless the gear is engaged in
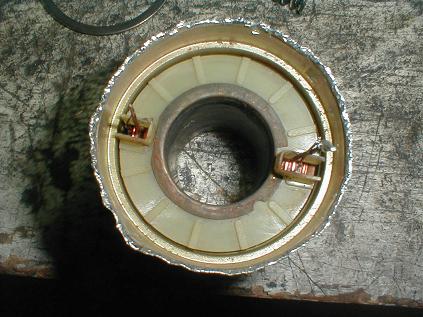
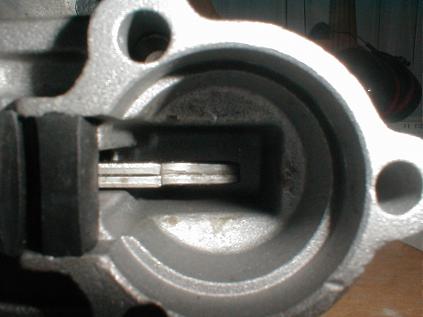
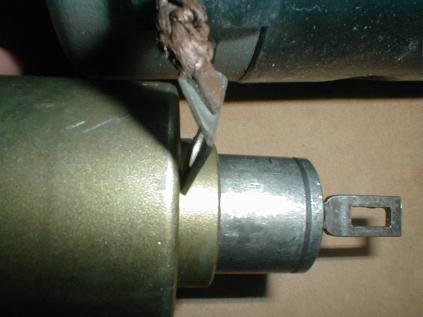
the flywheel. The picture below shows the inside of the solenoid housing
on the starter, with the lever that turns into a fork on the other end to
throw the starter gear into the flywheel. The picture to the bottom right
shows the iron plunger with its rectangular cut out end that grapples the
lever in the housing. The can and phenolic lid are factory marked for alignment.
|
|
|
|
|