I started out the floor and frame rehab job hoping I could stick with rolling
the rug up a bit and working from beneath the car. No such luck. When I got
serious and removed the central console (built around the gear shift and
emergency brake on the hump) and rolled back the rug, the rust was basically
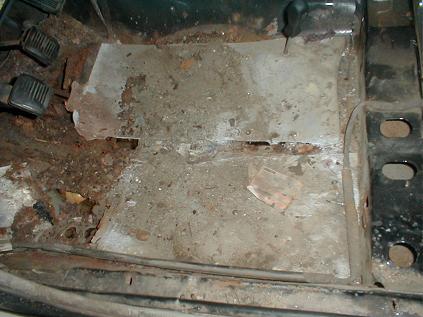
sitting there in piles. The picture to the right is the driver side, where
the floor rotted out around 10 years ago and I replaced it with some heavy
aluminum sheet left over from factory warning signs. The good new is that
the aluminum held up great, and the galvanized sheets screws I used to install
the aluminum actually backed out with a Philips screwdriver, in those cases
that there was any steel left for the screw to grip.
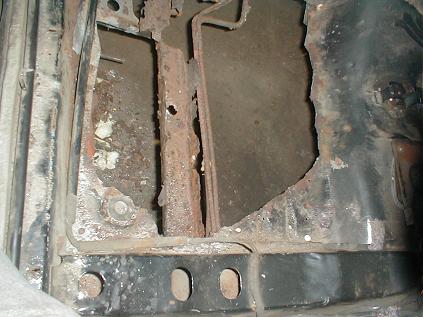
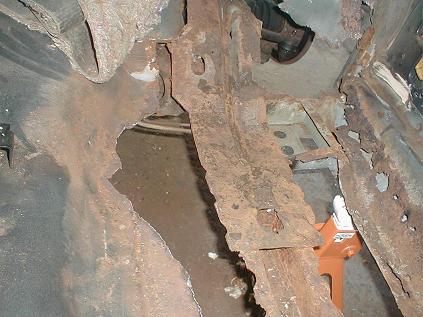
After I got the aluminum out, doing my best not to crack any of the brake
lines that were strapped to the subframe, all that remained were a bunch
of jagged holes. I cleaned it up with snips (photo to the left), taking it
back top the "good metal", which pretty much went right to the hump in the
center of the car, back to the unibody subframe cross element at the bottom
of the picture, which is in decent shape, and over to the frame rail under
the doors, which is the closest thing to a real frame the unibody has. That
rusted out strip of metal in the center of the photograph is what remains
of the subframe. If all it did was hold up the floor, that would be no big
deal, but it continues (or used to continue) into the engine compartment
where it is the anchor for the cross-member that the lower control arms are
mounted on, that the rack bolts to, etc. A little higher up it supports the
shock tower.
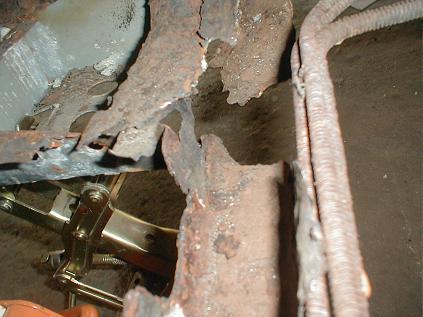
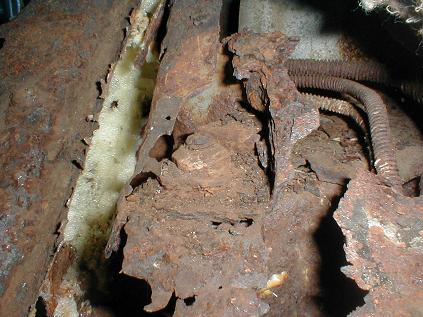
The photo to the right is just a closer view of where the subframe used to
intersect with a stub element coming off the rail frame at the end. No a
lot to look at now. Below in the center of the photo you can see the bolt
and nut which hold the cross-member to the corroded away subframe. I figure
my best bet is to buy some steel tubing to replace the subframe, to bolt
or weld a L bracket to the side in the right position to catch that cross-member
bolt, and that should help tie the front end back together. The subframe
further up in the engine compartment is good enough for a through bolt The
photo to the bottom right is the passenger side, which as in much better
shape, as a large part of the subframe survived under the floor. A little
further up into the wheel well, however, it's just as bad as the drive side,
so the same sort of repair tying into the cross-member will me necessary.
I'm also including a little sequence of discovery videos so you can see where
those nice holes came from. I started from working in the wheel well (to
the right), peeling away bondo and rust until there was nothing left but
a dusty rug pad, or sound proofing. The video below shows my first look under
the rug, which I should have seen coming based on the exterior hole. The
last video at the bottom right is the start of the corrosion control process,
i.e., getting rid of the rust. Any corroded metal that falls away when you
tap it with the butt end of a breaker bar isn't serving a structural function
anymore, it's junk. Until you bash away at it a little, you're just kidding
yourself if you try to "save" it for the sake making the job easier. It will
just be frustrating when you try working tying into it, not to mention all
the sharp edges and that it will provide a "rust starter kit" for the new
steel you put in.